

I’ve finally got my first kombucha recipe going, and man am I excited. Since my last post on this, I’ve done a lot of passive research on the goings on of brewing and flavoring in many different kombucha recipes. I found out there’s a lot of misinformation about the process out there, so my plan is to share the entirety of my kombucha adventure with you all, the learning process, and everything.

In my last post I only explained what kombucha is, here I intend to show you how to start a batch. Anyone that knows anything about this process knows that (depending on size of brewing vessel) it can take from 1-4 weeks to brew to completion. I started this process four days ago, but I’ve taken plenty of pictures of the forming SCOBY to share in my next post on the subject.

So time for a refresher, what’s in a kombucha recipe?
You need:
Tea: Lots of debate online about this, some claim you can only get good results with organic black, where others say you can get good results with just about any tea if you do it right. I started with cheap black tea and fancy high quality green tea for my test runs this time, as that’s what we had.
SCOBY and starter: This would be some of that weird textured filmy stuff and the juice it comes in. You can buy these online or get one from a friend like I did.
 Get 1 X Organic Kombucha Scoby – Live Culture here on Amazon!
Purified Water
Good Quality Sugar (Pure Cane, Coconut, Brown, Piloncillo, Honey, Maple Syrup, Agave, etc.)
There are commonly used ratios that I adapted for my batches, as I’m not sure any one of them was the gallon recommended starting size. The tea needs to be sweet, and the more sugar the better. From my understanding the SCOBY eats the sugar and the stuff in the tea.
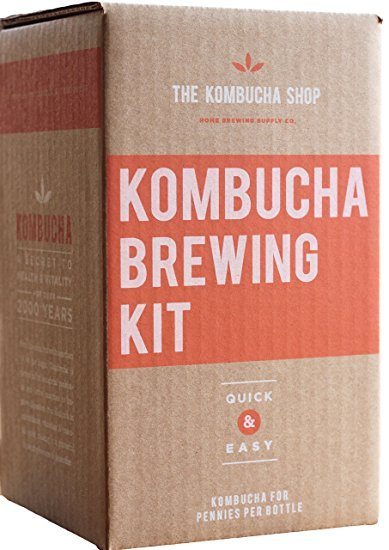 Get a Kombucha Brewing Kit with Organic Kombucha Scoby on Amazon!
The ratios are as follows:
1 cup sugar or sweetener: just under 1 gallon purified water: 5 tea bags or loose equivalent.

It all starts with brewing tea. Just brew it as you usually would, only adding the sugar when the liquid is hot. Strain any loose leaves and allow the brew to come to room temperature.

I had several pots around as I experimented. I’ll just list the things I made below and in what jars:
1 quart jar black tea, piloncillo for sugar
2 quart jars of green tea, white cane sugar
Under a gallon of black tea with white cane sugar

My research tells me that brewers use all different types of sugar, although white sugar evidently yields the best most consistent results for new people. I experimented with Mexican piloncillo, this time coming in these little easily choppable nuggets.

It’s literally refined sugar cane sugar, condensed and formed into cones or rolled into these nuggets before drying. Probably one of the most natural ways to consume cane sugar, so we’ll see how it goes!

Here’s an example of the pot prepared for hot water, ready with sugar and bags. I only used two for this little batch as it was destined for a quart jar.

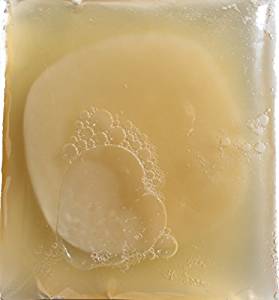
It all started with this big thing. From my understanding, that big gelatinous thing is actually the byproduct of the scoby, with scoby suspended in it, not the scoby itself like many believe. This is supported by the fact that you can use already made kombucha to start a new batch if you do it right.

Removed from the jar, it was a bit intimidating. The room smelled of vinegar and this thing was weirdly textured. I was excited though, so I got to work chopping it into pieces to split between my jars.

Piece by piece, they got dropped into the jars now filled with room temperature tea.

Here’s an up-close shot of the old scoby, which was floating underneath the new one. Generally, the old scoby stays submerged while a new one floats to the surface and coats it in a disk like shown in this article.

I added SCOBY and starter to each one to ensure they get their best start, while also emptying my big jar. We emptied it, cleaned it, and poured tea in it so it too could receive a SCOBY and some starter fluid.

So here they are, all wrapped up and ready to ferment. We cover them with filters to allow it to breathe while keeping the flies out. Not enough air flow will cause molding and other issues. These coffee filters fastened around the top have worked pretty well so far.

I’ve been having a lot of fun with this experiment, so stay tuned as there will be much more to share very soon. I won’t give much more away, but watching this grow and change has been pretty incredible, so I’m excited to share it with you all in the future. For now, I’ll leave you with this.
Thanks for reading and supporting, happy brewing!
Click here to check out the 3rd part of the 8 part series! By part 8, you will have the knowledge you need to start your own Kombucha brewing project!